Saturday, September 23, 2017

Green Kid Crafts: Ocean Science Discovery Box

Contents as displayed on Amazon
My kids get the Koala Crate and Kiwi Crate boxes and absolutely love them, so I had high expectations for Green Kid Crafts. It's a similar concept--they also have a mail delivery program--but a variety of boxes are also available on Amazon. Since I was preparing for our Ocean unit, I thought the Ocean Science Discovery Box would be a great addition to our hands-on curriculum.
It looked great on the website and I was excited for it to arrive.


When I first opened the box, I was disappointed by the quality of the items and the crafts themselves. I felt like I could've gathered all the supplies myself for a lot less money. There was nothing particularly specialized or that would've been difficult to obtain or create on my own. A perfect example is the Sea Life Rescue bag, described as an activity where kids can "'save' felt sea life caught in nets and learn about bycatch." The bag contained felt squares rather than the actual sea animals as pictured (the kids were supposed to trace their own sea creatures on the felt--no stencils or outlines included), sticker eyes rather than the google eyes pictured, and the "make your own fishing pole" consisted of a pencil and a string.

Still, I had already purchased the kit, so I decided to go ahead and try it with my kids. I hoped it would be better once we started the activities, and as long as the kids enjoyed it, I would be happy.

So we began with the Glowing Jellyfish activity, which was supposed to make three glowing "jellyfish" that the kids could float.  The jellyfish was a supermarket produce bag, with a glow bracelet body. There were problems as soon as we began the activity, since only one of three bracelets worked. I'm sure you can imagine the scene--me trying to do something that's supposed to be fun and two very unhappy kids, disappointed that their bracelets aren't glowing. And to make matters worse, only two of the inner zip-lock bags were included, so I now had one child unable to make his jellyfish float along with a broken bracelet. (I understand these kits are typically made for one child, but the activity was intended to make three jellyfish, whether for one child or not.)


The next activity we attempted was Coral Reef Art. Some of the paint had leaked out of the tiny containers, and what was left was separated. It did mix up okay when I added the water though. The idea was to blow bubbles into the paint container and then smash them down with the art paper. My kids had a great time blowing the bubbles and they thoroughly enjoyed the ensuing mess. However, smashing the paper onto the bubbles did not result in anything like the example drawings. All my kids could get was faintly colored smears, with no round or bubble shapes. We tried it several different ways, but it never turned out. After my kids tired of blowing the bubbles, they were done with the activity, and not at all impressed with how the painting turned out.

We didn't do the other activities in the box, but I don't think I would have gotten any better results than I did with the two we tried. I'm highly disappointed in this box, and will not be trying their other boxes, which I had originally hoped to do. I will not be using any of their products in the future, and would definitely not recommend these to anyone!

Friday, August 18, 2017

Banana Pancakes for Baby with DōTERRA Brand TERRA GREENS


I'm always looking for yummy new ways for my babies to feed their body healthy, feel good stuff. We just got our DōTERRA Brand TERRA GREENS in yesterday and this morning I used some in Harper's Pancakes! 


Here is the recipe: (NOTE: Harper is 10 months old so instead of milk I used formula)

  • 1 Cup of Whole Wheat Organic Flour
  • 3 tsp of Baking Powder
  • 1/2 tsp of Kosher Salt
  • 6 ounces of Water (or if breastfed baby, 6 ounces of breastmilk; or if for a toddler, 6 ounces of milk)
  • 1 Organic Banana 
  • 1/4 of a scoop of DōTERRA Brand TERRA GREENS
Add all of the ingredients together and mix in a blender. Pour mixture in round sections in a greased pan (we use H-E-B Central Market's All Natural Olive Oil Spray). Flip when the top is bubbly (just like regular pancakes).  Once the other side is cooked (not too brown for baby), remove from heat. Let cool and let baby enjoy! 


I think she wants some more...


Want to try this for yourself? Buy TERRA GREENS here!
(We recommend buying your doTERRA products only from trusted sources, NEVER from Amazon or Ebay, in order to ensure quality and purity.)

Monday, August 7, 2017

Our Pirate Themed Pizza Party


Ahoy!

Here are some fun things we did at our Pirate Themed Pizza Party!

Treasure Chest Party Favors 


We used Strawberry Plastic Containers and spray painted them for the chests. I grabbed these Pirate Party favors from Party City to fill the chests.

Beau loved helping me with this.


Boats for Each Kid for watching the movie Hook


I just used plastic bins I had around the house, duct taped a cardboard mast on there, and attached a black piece of construction paper with each child's name on theirs.

Pirate Cut Out Photo Prop


Since I love Amazon's Subscribe and Save so much, I don't just stop with the products I buy, I use their cardboard boxes too! Look at this fun pirate cut out I made. So fun for photos!

Mantle Display


I gathered anything remotely close to pirate stuff I had around my house (and in my Halloween stuff) and added them to my mantle!

Pirate Reading Tent


This is a $12 tent we take with us to the beach so Harper has a clean place to crawl and stay out of the sun. Who knew it would double as a totally awesome pirate reading nook?

Message in a Bottle


I found these plastic dolphin and fish bottles at Hobby Lobby. We filled them with sand and shells and then wrote a cute message on a square piece of paper, rolled it up and put it in the bottle.


Cardboard Swords


Alisha cut out swords from cardboard boxes! We used black duct tape for the bottom and pirate stickers and foam letters to decorate the top.


Walk the Plank


How fun is this!?!? Alisha's husband grabbed these wooden spools and board and made us a plank! We put a plastic pool under it with a little water. This was definitely the hit of the party.


Pirate Themed Food!

Pizza Treasure Maps and Boats


Pretzel Driftwood


Fruit Swords


X Marks the Spot Chocolate Chip Cookies!


Thursday, July 27, 2017

Sea Shell Sorting

We are here enjoying the Gulf of Mexico for a full week! The sun, the sand, the shells.... so many shells!


We have been using our mornings to collect shells. (I'm still crossing my fingers for a sand dollar). 


We fill up our bucket and then take them back to the house to rinse them off. 


Once rinsed, I put them on the table and let Beau and his friends sort them by size. Small, medium, large. 


Grab your Shell Sorting by Size by clicking on the picture. 


Thursday, July 13, 2017

KoolAid PlayDoh with AromaTouch doTerra Oil

One of my good friends passed me this KoolAid recipe she found and I absolutely love it! 


Being a previous kindergarten teacher, I've tried homemade play-doh before and it totally sucked. This one put my belief back in homemade play doh! And, you can add doTerra essential oils in it to add a nice calm aroma to it!

Here is what you need for the recipe:

  • 1 Cup of Flour
  • 1/4 Cup of Salt
  • 1 Packet of Kool-Aid
  • 1/3 Cup of Water 
  • 1 Tablespoon of oil
Here are the directions:

  1. Mix the flour, salt and Kool-Aid packet together while you boil the water
  2. Once the water is boiling, add the oil
  3. Remove from heat and add the water to the flour mixture. Add enough until you get a play doh consistency. 
  4. Once cool enough to handle, form in to a ball. 
  5. Once completely cool, add your favorite doTerra essential oil. We used AromaTouch for its grounding and calming smell.

Tuesday, July 11, 2017

Make It! Stuffed Peppers by Noah

Stuffed Peppers, by Noah


After all the fun we had picking fresh veggies at Froberg's, we were surrounded by peppers! Luckily Noah had an idea for what to do with them, using her much loved, kid-centered cookbook, Cook School.

Stuffed Peppers:


  • 1 tablespoon cream cheese and 2 teaspoons plain yogurt (we used Greek yogurt) per pepper
  • Assorted herbs (we used Dill and Thyme)
  • Peppers (we used green peppers, banana peppers, and gypsy peppers--because that's what we picked!)


As suggested by the cookbook, I took Noah to a store with a large selection of fresh herbs and allowed her to smell all the different varieties. She choose 2 that she wanted to try in her recipe.

To prepare, clean the peppers and halve the larger ones. Children can remove seeds and ribs with a spoon. Mix cream cheese and yogurt together, adding salt and pepper to taste. We chose to separate the mixture into two bowls, so we could add each herb separately.
Fill each pepper with the mixture.


Watch Noah in action!


Sunday, July 9, 2017

Tomato Sauce Recipe

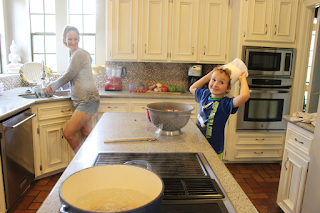
We are up to our ears in tomatoes over here from our trip to Froberg's Farm! I love doing things like that because the learning doesn't end when you leave the Farm. With all of our goodies we picked we've been having fun in the kitchen! 


Here is a pizza/ tomato sauce recipe that is not only delicious but is kid friendly too!

First, you need to remove the skins from your tomatoes. Do this by boiling a pot of water. Have a bowl of ice water on hand as well. 


Place several tomatoes in the boiling water and leave for a few minutes. The skins will start getting crinkly, sort of how little fingers get when bath time is almost up! 


Use a strainer spoon to scoop out the tomatoes of the boiling water and put directly in to the ice water (this stops the tomatoes from cooking any further). Let sit for a few minutes to make sure they are no longer hot. Have your little one pull the tomatoes out of the ice water and place on a clean towel. 


Then you can easily pull the skins off. 


Beau thought this part was disgusting. 


Once you've pulled all of the skins off, you can throw the naked tomatoes in a pan over medium high heat. Mash the tomatoes with a potato masher. 


Remove the mashed tomatoes from the pan, and add in about one chopped yellow onion, three cloves of garlic and a few peeled carrots (these were left over from me spiralizing carrot noodles!) Sauté for a few minutes, or until the onions are translucent. 


Add the mashed tomatoes to the pan with the onion, garlic and carrots. Add in some fresh basil leaves (I pulled Five from my little plant out back). Also add in three bay leaves (I buy these dried in the little jar by the spices). 


Add salt and pepper and stir!


Lower the heat to medium low and cover. Simmer for about an hour, stirring occasionally. 

After an hour of tomato-y sauce-y smell-y goodness is done, remove from heat and let cool. Once cool enough to handle, pour sauce in a blender (I use my vitamix) and purée until smooth. 


Package in a ziploc bag and freeze, or jar and store in the fridge for up to a week.